This website has been archived from TrainWeb.org/ironbelt to TrainWeb.US/ironbelt.
This website has been archived from TrainWeb.org/ironbelt to TrainWeb.US/ironbelt.
Back to Ore Bridge Home Page Back to Projects Folder
(A Tale Of Two Winches)
I realize it's been 3 months since my last posting related to this project, but rest assured, it is still active. The combined forces of family demands and Murphy's Law severely curtailed progress on the model. Also, since the work I am about to describe is likely the most difficult for the entire project, I wanted to be sure all the pieces fit together properly before sharing it with the world.
Back in early January I scratchbuilt a clamshell bucket in brass. At that time I hadn't actually planned on fully animating it. However, in the meantime, I discovered some interesting items in the most recent Micro-Mark catalog, including paint-on electrical tape and a ready-to-run planetary gear set; so, with these and a bit of corrective surgery on the main span, I could build a hands-free operating bucket mechanism.
My biggest challenge was figuring out how to deliver electrical power to each of the two winch motors - independently of each other and the tram drive truck. First I would try running four trolley-type lines; I was all set to install them until I realized how difficult it would be to hide all the additional wires that would need to snake up the legs of the bridge. So the moment of truth had arrived: I had no choice but to unearth my long-mothballed Digitrax Chief starter set and learn how to program DCC decoders.
My initiation into the realm of DCC was made easier by fellow modeler Rich Daniels*, who helped me decipher the various key words in the Digitrax manual so I could get the two motors connected and programmed. Thanks also to Nick Kulp and the guys on the Yahoo Digitrax newsgroup, who offered their assistance when Rich was out of town.
*Rich is no stranger to industrial modeling: He scratchbuilt an HO scale replica of the Front Royal, Virginia Avtex rayon plant, which resides on Jim Brewer's N&W Shenandoah Division layout.
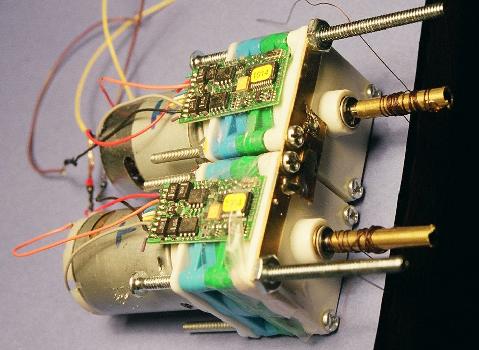
Here are the two winch motors with their associated decoders, and planetary gearboxes configured for a 30:1 reduction ratio. |
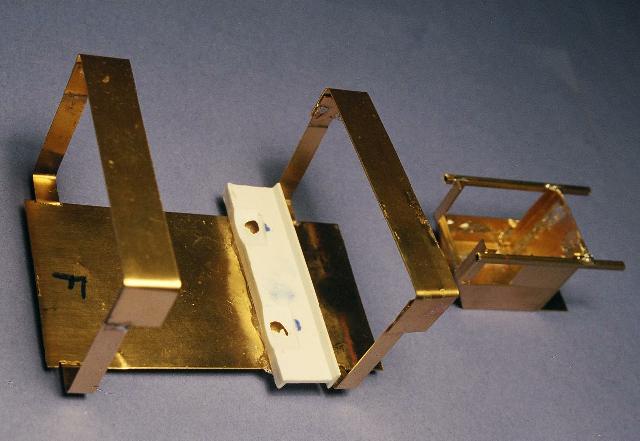
I decided to construct the tram frame out of brass, since it is more durable. The control cab (at right) slides into position underneath. A styrene 1/2" I-beam, used for supporting the back ends of the motors, was cemented to the brass platform via Cool-ChemTM cyanoepoxy. |
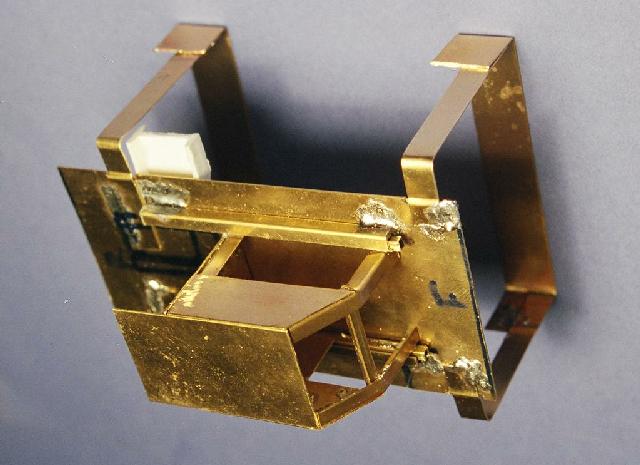
An underside view with the control cab attached. |
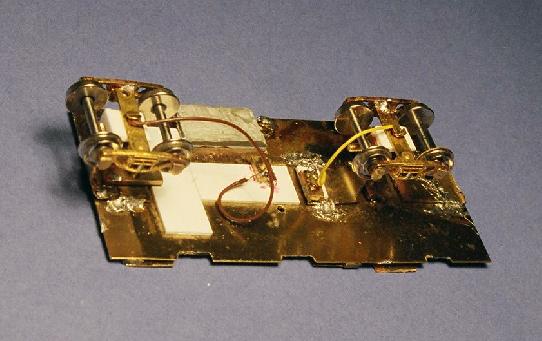
The top supporting plate with the original brass-sideframe trucks. I later replaced these with vinyl trucks after one of them shorted against the bridge, frying a decoder in the process. |
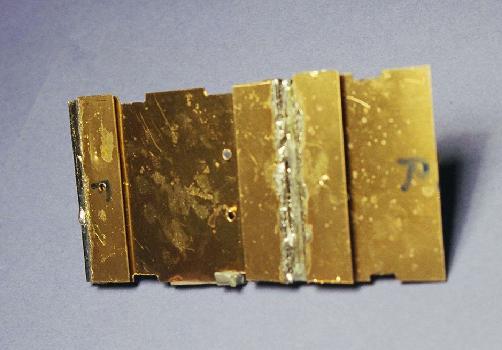
The brackets on the lower tram platform slide under mounting plates on the underside of the top platform, and are held in position by set screws. |
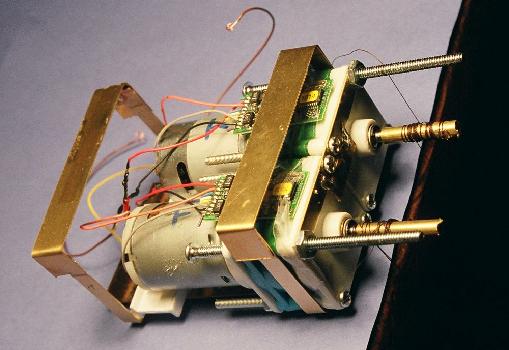
Gear boxes mounted on tram bottom platform. Wire connections are insulated with paint-on electrical tape. |
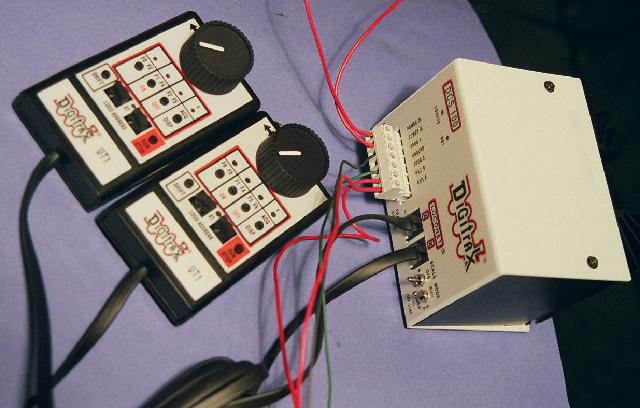
A Digitrax controller, along with the two simple UT-1 throttles used exclusively for operating the clamshell bucket. I learned quickly that flip-flopping control between two winches on a single throttle leads to tangling of the slack cable. |
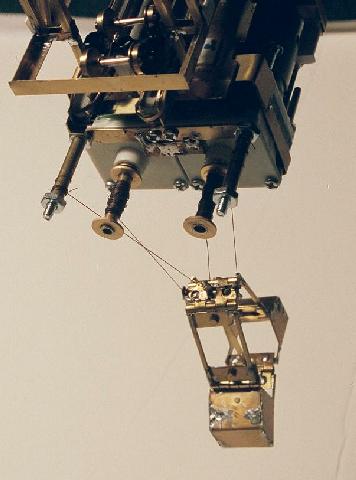
A view of the cabling arrangement. Not exactly prototypical I admit, but infinitely better for reliable operation. The two ends of each cable are spread apart as far as possible to prevent the bucket from spinning. Pulleys would certainly look better, but I had nightmare visions of the thread coming loose and getting stuck between the pulley and its axle; so I used smooth-edged guide holes instead. The stationary ends of each cable are wound around a brass tube, which is held somewhat firmly in place by a locking nut. Whenever the bucket operator fails to stop the winch motor before reaching the top, excess cable simply unravels from the stationary tube - no thread breakage or bucket damage occurs. |
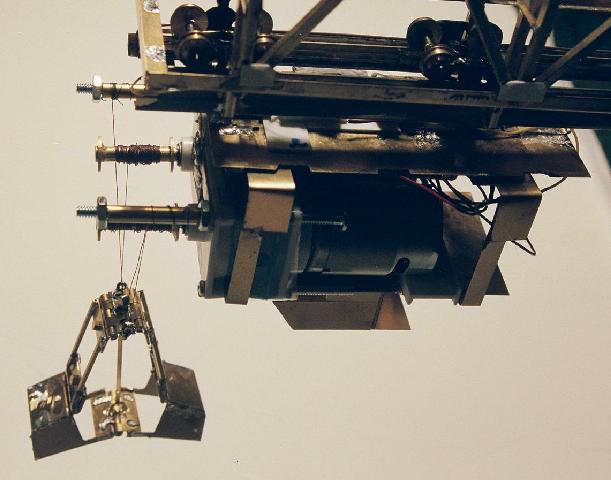
Here is a top view of the semi-completed tram/bucket mechanism... |
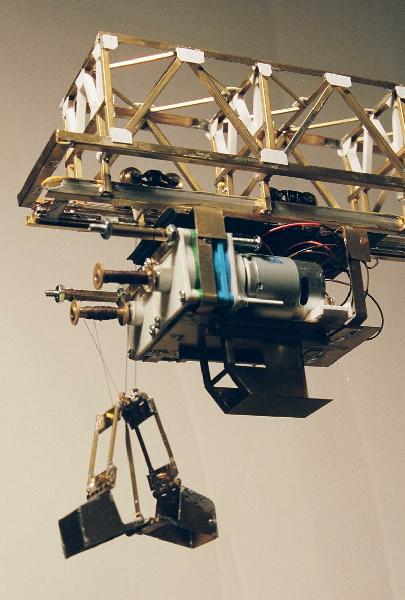
...and an underside view, looking up.
|
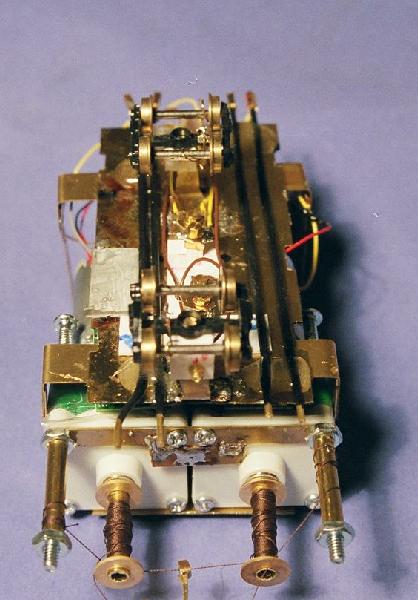
The four black rods on the tram's top platform are parallel leads for the winch motors, covered with paint-on electrical tape. I installed these as a sanity-preservation move; I became quite frustrated having to disassemble the mechanism to hookup a voltmeter to the malfunctioning motor whenever it failed to respond... |
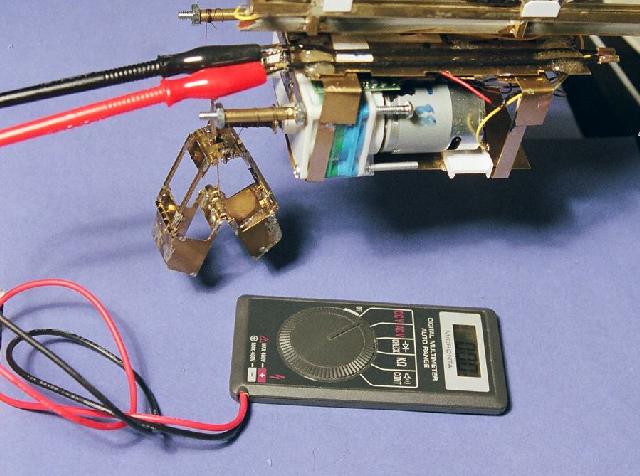
...it's MUCH EASIER this way! |
I still need to sheath the entire tram mechanism in corrugated styrene. Once that's done, I can start adding the access platforms, stairways and handrails.
Perhaps I can finish this thing and have it painted before the next LINESIDE is due...
-KJL
Back to Ore Bridge Home Page Back to Projects Folder
.